Zur professionellen Entwicklung gehört auch eine gute IDE. Ich verwende dafür PHP Storm und davor Netbeans, aber viele Entwickler empfehlen das kostenpflichtige Zend Studio bzw. das ähnliche aber kostenlose Plugin für Eclipse von Zend: das PDT-Plugin.
Die Installation von Eclipse incl. Plugin kann sehr einfach im „All-in-one-Package“ durchgeführt werden.
Wer bereits eine bestehende Eclipse Installation besitzt und Eclipse nicht deinstallieren will, kann das Plugin einzeln installieren, wie im Folgenden beschriebe:
Installation des Eclipse PDT-Plugins für PHP unter Windows7
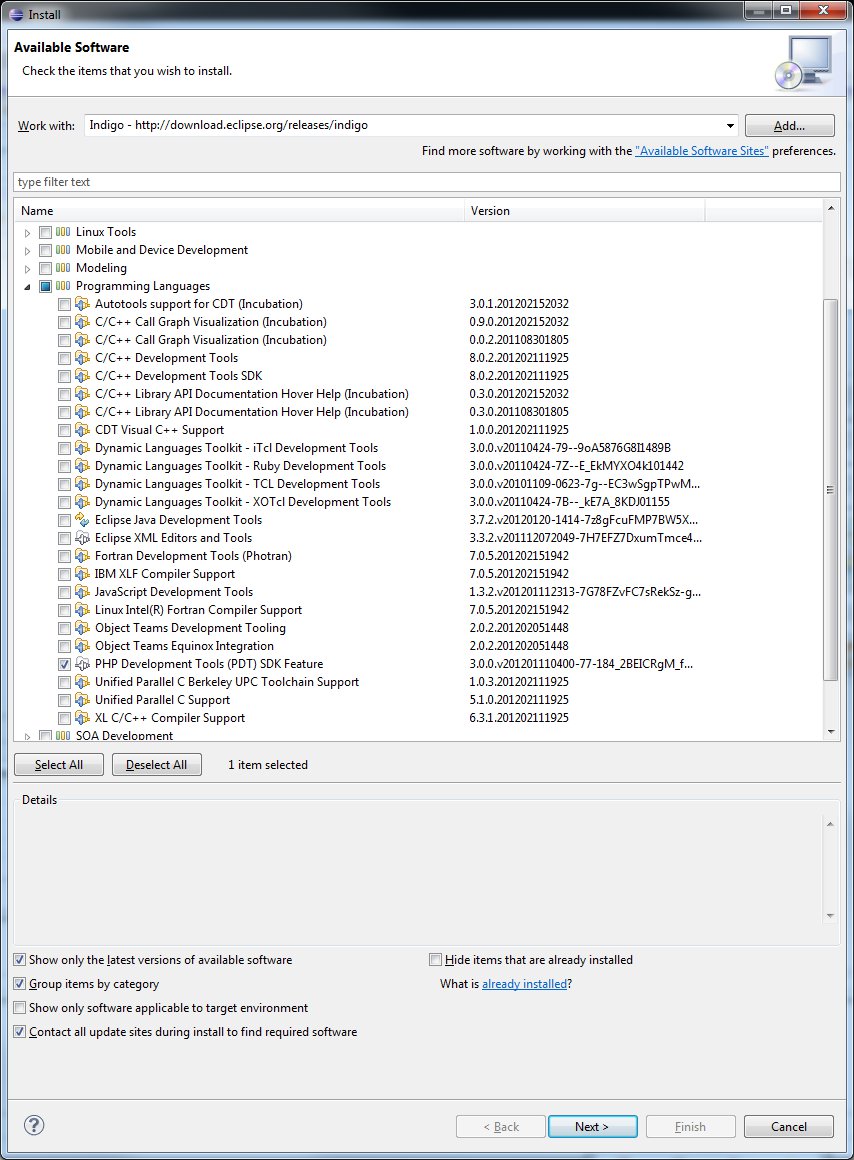
- Öffnen Sie Eclipse, und gehen Sie zu Help->Software Updates->Find and Install
- Wählen Sie „Add“
- Erstellen Sie eine beuen Eintrag mit den folgenden Details: Name:Indigo, URL: http://download.eclipse.org/releases/indigo
- ACHTUNG: Es sollte auf keinen Fall die Installation über http://downloads.zend.com/pdt durchgeführt werden, weil diese fehlerhaft ist.
- Wählen Sie Programming Lanuages/ PHP Development Tools (PDT) SDK Feature und klicken Sie auf „Next“, um die Installation zu starten.
Erstellen des ersten Projektes
Es empfiehlt sich, wenn man Eclipse für mehrere Programmiersprachen nutzt (ich benutzt z.B. Eclipse für Java bzw. Android) getrennte Workspaces anzulegen um Ladezeiten zu verkürzen, bzw. das Layout von Eclipse zu individualisieren, Es kann auch empfehlenswert sein, für jedes Projekt oder Kunden einen eigenen Workspace anzulegen.
Wenn dass Plugin korrekt installiert wurde, kann man in Eclipse nun mit File-> New ->Project ein PHP Project auswählen:
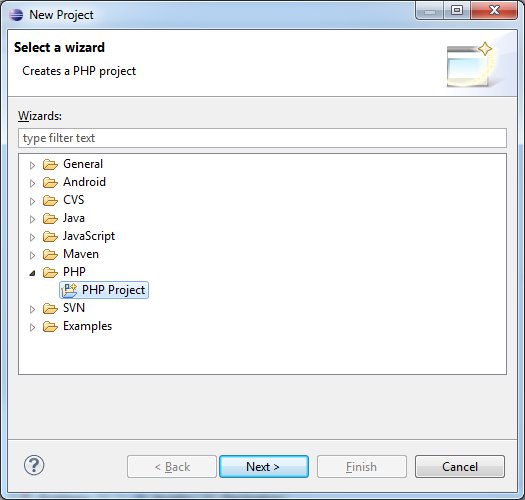
Das erste Projekt sollte zum Testen in das htdocs Verzeichnis von Xampp erstellt werden, damit auch lokal getestet werden kann.
Interessante Features von Eclipse
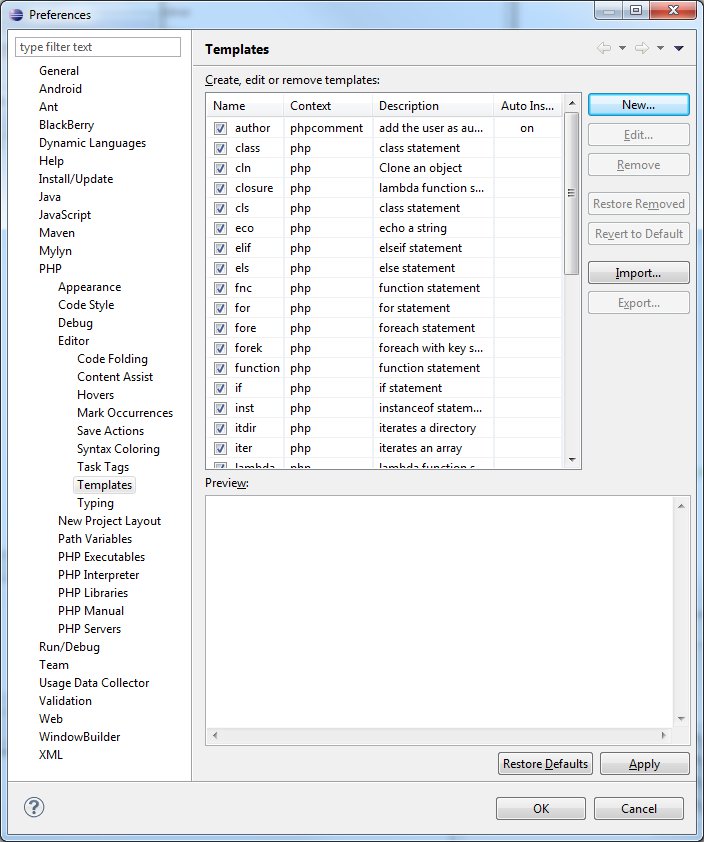
Sehr praktisch sind Code Templates, die eine Menge Tipparbeit abnehmen:
z.B: cls, elif,fnc, forek, my_far usw.
Zum Testen einfach bspw. forek eintippen und STRG+Leertaste und Enter, dann wird folgender Code eingefügt:
foreach ($array_expression as $key => $value) {
    ;
}
Es können auch eigne Templates eingefügt werden bzw., bestehende Templates Tags durchsucht werden mit: Window->Preferences->PHP>Editor->Templates
Zugriff auf MySQL Datenbank
Mit einem zusätzlich Plugin lassen sich Datenbank-Inhalte direkt anzeigen und ändern lassen in Eclipse.
Als erstes muss das allgemein Datenbank Plugin installiert werden genauso wie die Installation des PDT Plugins:
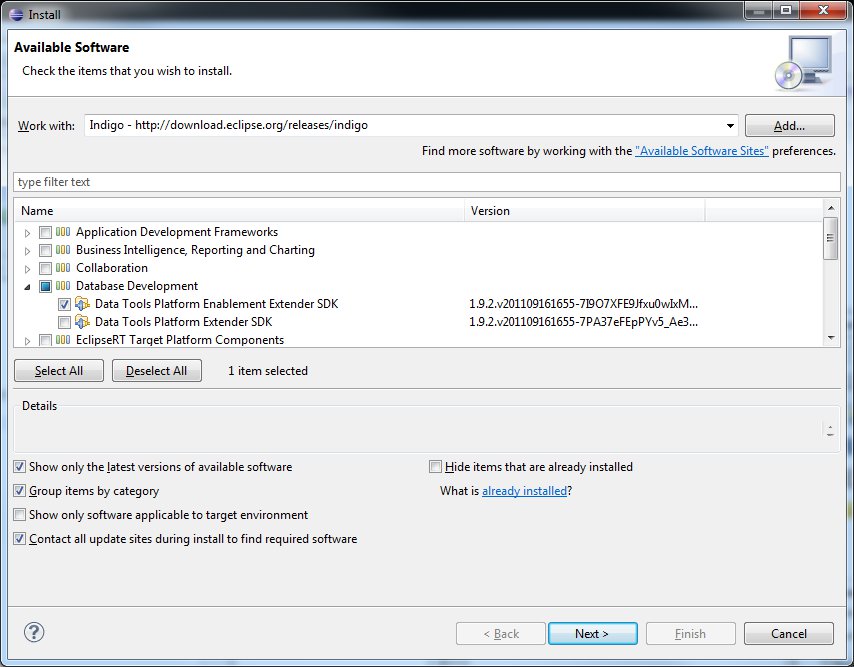
Um auf MySQL zugreifen zu können, muss noch der entsprechende JDBC Treiber installiert werden.
- Download der Treiber (Anmeldung nötig, irgendwelche Dateien eingeben, E-Mail muss nicht verifiziert werden) und entpacken in ein beliebiges Verzeichnis
- Zugriff einrichten:File->New->Other
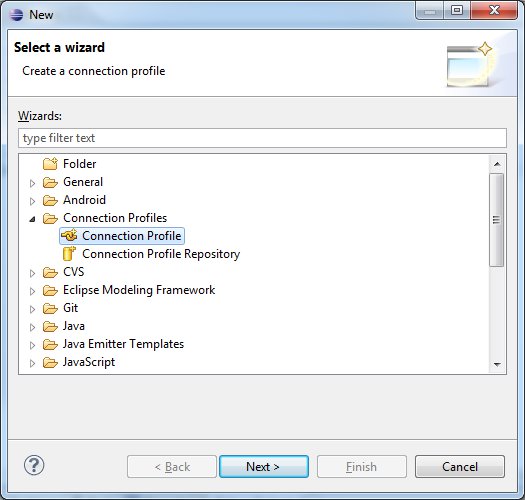
- Connection File->Connection File auswählen:
- MySQL auswählen
- Treiber ändern: blaues Dreieck Icon klicken
- Alle Infos ausfüllen und unter JAR-List die JAR aus den entpackten Treiber auswählen und bei Properties bspw. eintragen (auch DB-Server sind möglich, die nicht lokal laufen)
- Es ist sehr wichtig bei der URL auch die Datenbank nochmals einzugeben, weil sonst in Eclipse keine Tabellen angezeigt werden: jdbc:mysql://[server_name]:3306/[schema_name]
- Mit Test connection kann sofort überprüft werden, ab die eingeben Daten korrekt sind
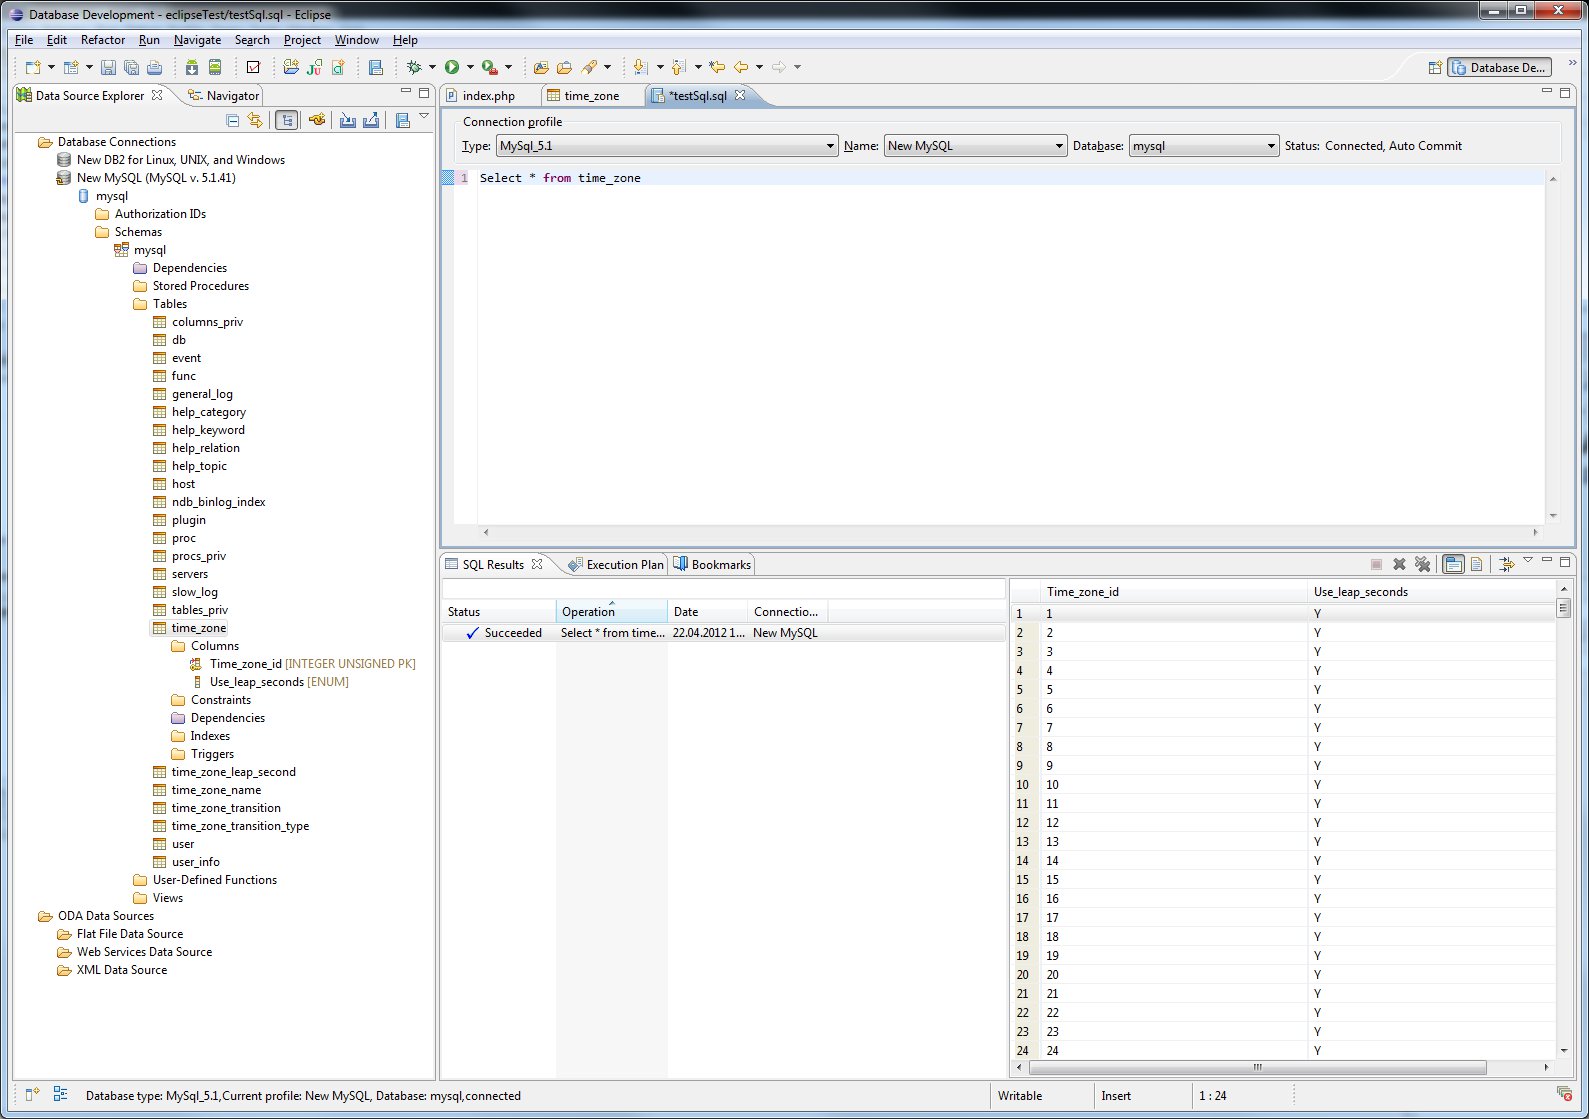
Nach fertiger Konfiguration kann die DB in Eclipse bearbeitet werden. Dazu sind die Views Data Source Explorer und SQL Results vorgesehen. Diese können über Window->Show View->Other->Data Management ausgewählt werden:
Es können einzelnen Tabellen angezeigt werden über rechte Maustaste auf die Tabelle Data->Edit.

Eigene SQL Statements müssen in einem .sql File geschrieben werden und können dann ausgeführt werden. Die Ergebnisse werden in der View SQL Results angezeigt:
Fazit
Eclipse eignet sich sehr gut als IDE zur Programmierung von PHP. Ich empfehle aber das schnelle und auf PHP Programmierer zugeschnittenen PHP Storm.
Aus dem Buch:
